


I was recently commissioned to create a Thank You card to accompany one of my note pads, which are hand stamped on each page. 😻
“I get to create something unique, that will serve a purpose; to show sincere gratitude in a thoughtful way. And…. I have a reason to go Shopping at Michael’s”. This would not be one of those times where I just go and browse, and delight in all that is there. I could actually purchase. And my purchase would not end up in a drawer or on a shelf, or in a closet. My sister wisely named these “closet projects”. 😆. I have adopted this name. I have had many. Some that sat for 20+ years.
I wanted to make something simple but pretty. I asked a few qualifying questions, including the theme and ocassion, and I was told flowers were ok for this project. Perfect! I love flowers 🌸🌹🪻
So off to Michael’s I went. It didn’t take long till a product jumped out at me. Pretty tiny paper flowers. Oh they would look lovely on water colour paper. Now I needed a Thank You embellishment. Presto! There was the perfect rubber stamp sitting on the shelf just waiting to go home with me. I was all set. I already had watercolour paper at home and the perfect black pen that worked really well. I had used it to make a little pen and ink sketch while I was at a small park by the water last fall. I haven’t done anything with that sketch yet. It’s still waiting. It’s in the closet but the door is open. I admire it every so often. My boyfriend didn’t even believe I had drawn it when I showed it to him. He was unaware of my one of few talents. When I finally made him believe he was very impressed. I still don’t believe it is that spectacular. But him thinking so made my day.
Back to my Beautuful little crafting desk. Another story of a beautiful acquisition, THAT was. The crafting process was quite quick and simple. I did up a draft. I set the little flowers on a folded piece of scrap paper, in the approximate size I was planning to make the card. Then I used my cherished black pen and drew on some stems. Next up, my new rubber stamp got to make a debut. Stamp on the black ink pad, stamp onto the demo card. Oooh! It looked lovely. I took a photo and sent it off for approval before making the real thing. Proof accepted. Woohoo!
Now onto the most fun part. Making the actual card. I really like watercolour paper. The texture is the main reason. It’s not flat. It has character. And I always imagine sitting by the seaside in a foreign country relaxingly painting an enchanting harbour with picturesque homes and shops lining the street behind.
So…. I cut a piece the size I would like. I wanted to make the card a little bit frilly so after folding my paper in half I cut a cute ruffled edge along both vertical edges; the front panel a bit narrower so that the back was visible as well. So cute.
The fun continued. I positioned my flowers on the front of the card without attaching them. I removed one flower and drew a black stem. Then the next, and so on. Then I glued each flower into its position with my glue gun (it’s the closest nastiest weapon below a BB gun). If you have ever burned yourself with one of these then you know what I am talking about. There is no mercy!
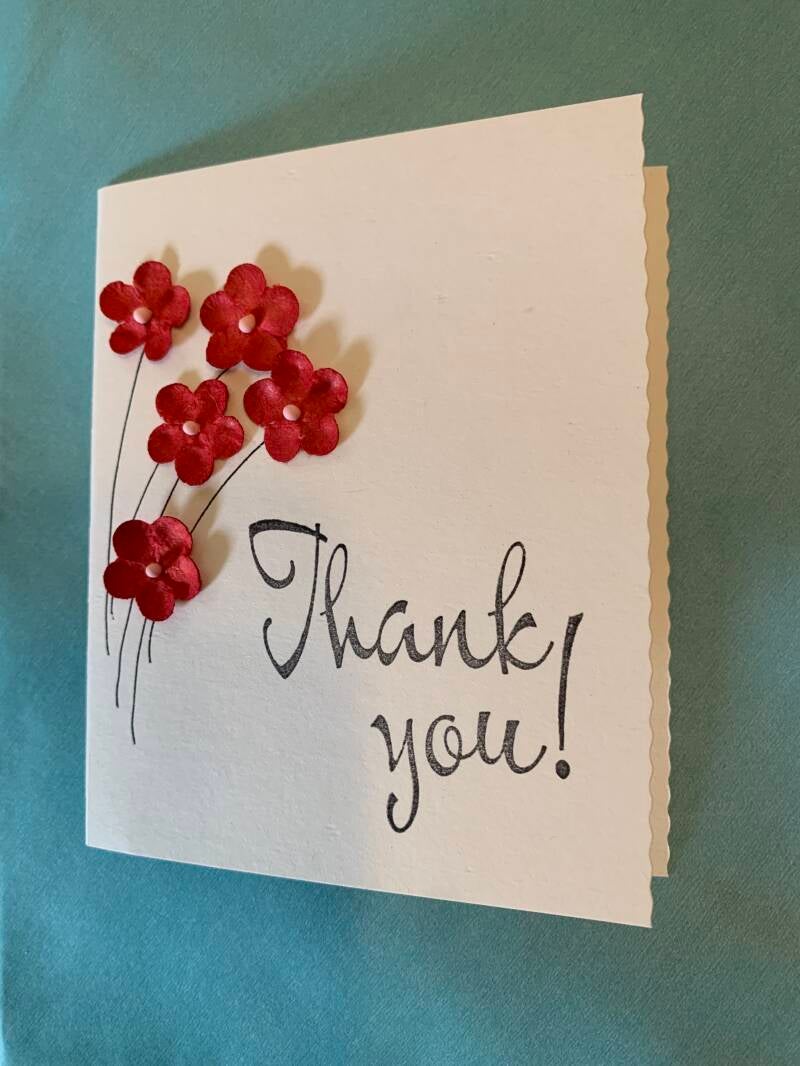
Final step, the Thank You. The little rubber stamp worked its charm. The black inked words matched beautifully with the black stems holding up the dainty, pretty red flowers that seemed to just hover. I was happy with it.
The newly created cards (two were requested for Administrative Professionals Day) were sent away accompanied by their note pads in colourful orange envelopes, ready to be enscribed with a personal message and given with gratitude.
The purchaser described them as “beautiful. Loved them! They’ll work perfectly thank you 🥰”. Later a quick note asking the recipients comments was answered with “They loved both, thought it was a really thoughtful and personal gift”.
A Triumph 😊🎉
Add comment
Comments